MIG Welding Mistakes – 9 Common Problems
This post contains affiliate links.
9 MIG Welding Mistakes – When To Troubleshoot
MIG welding mistakes can lead to a lot of frustration. However, laying down your first MIG beads can be a really rewarding feeling. It is a process that is relatively beginner friendly, and newcomers can have success with it very early on.
Although the welding part seems straightforward, there is actually a lot going on inside of the machine.
This guide will cover the MIG mistakes we most commonly see, and the best ways to fix and prevent them in the future. We have all made these errors in the past, but we persevered and learned how to correct them.
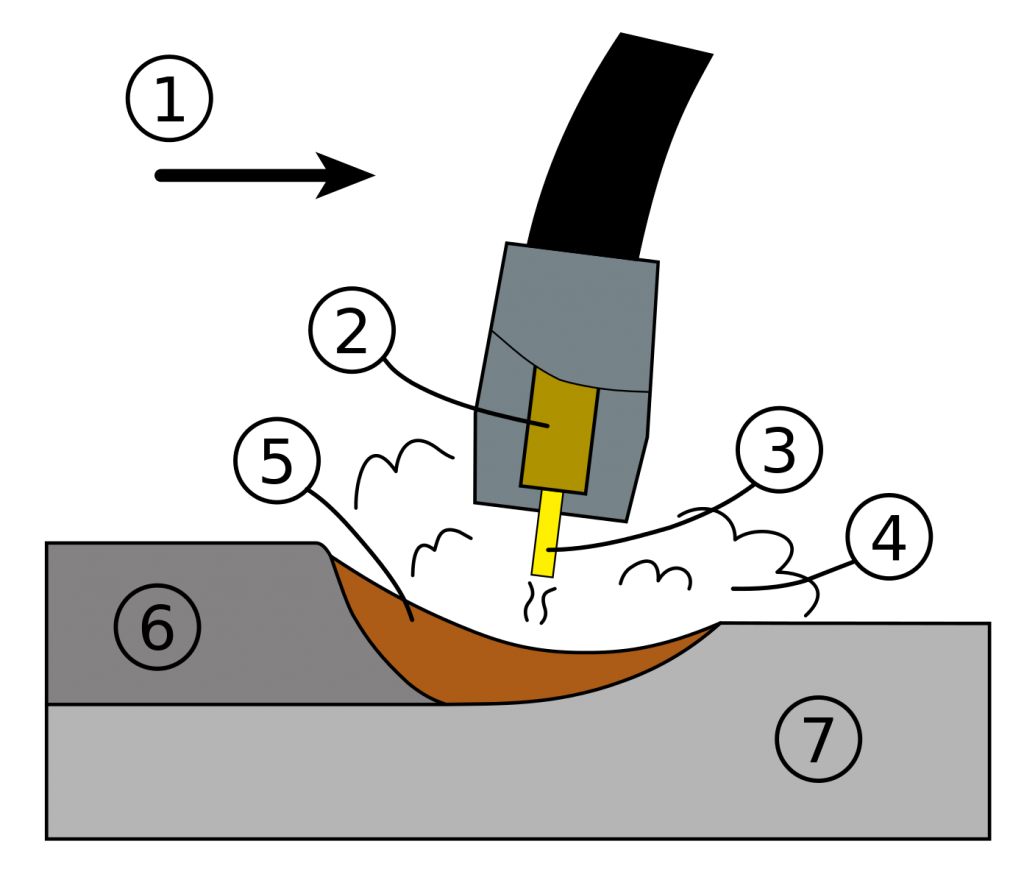
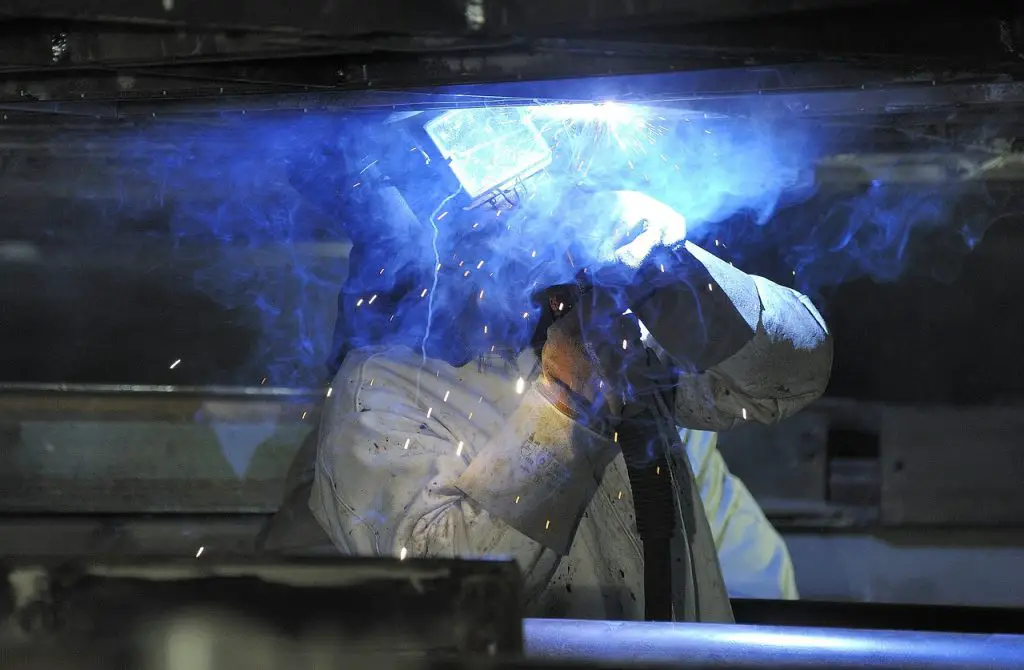
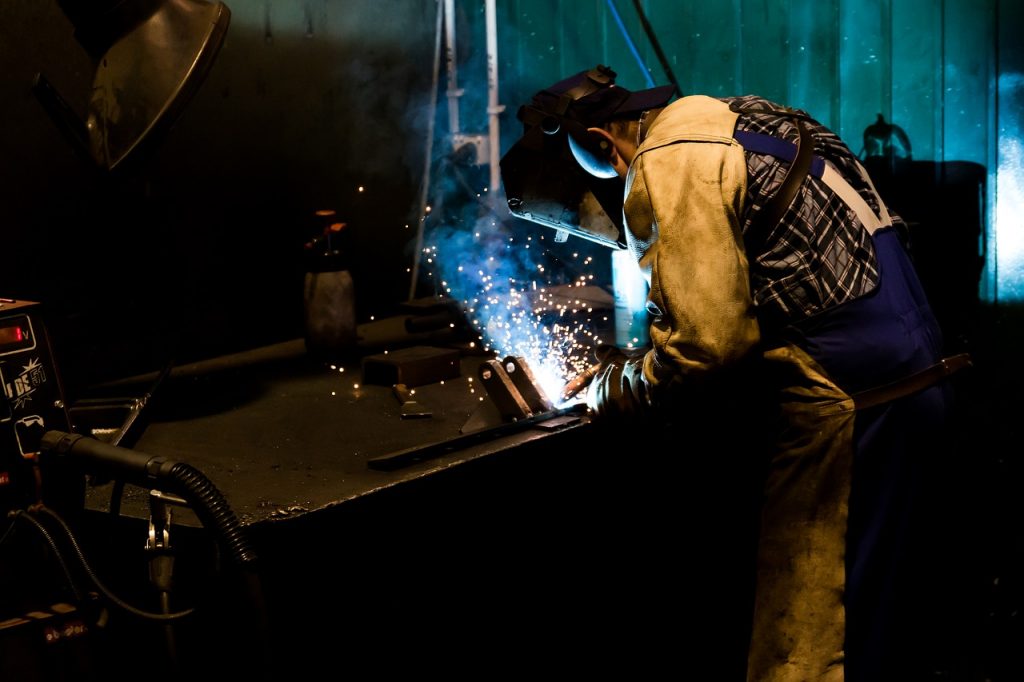
1) Improper Contact Tip to Workpiece Distance
Many new welders will hold the MIG contact tip either too close or too far away from their metal. Like all welding processes, proper distance between your electrode and your work piece can make or break a weld.
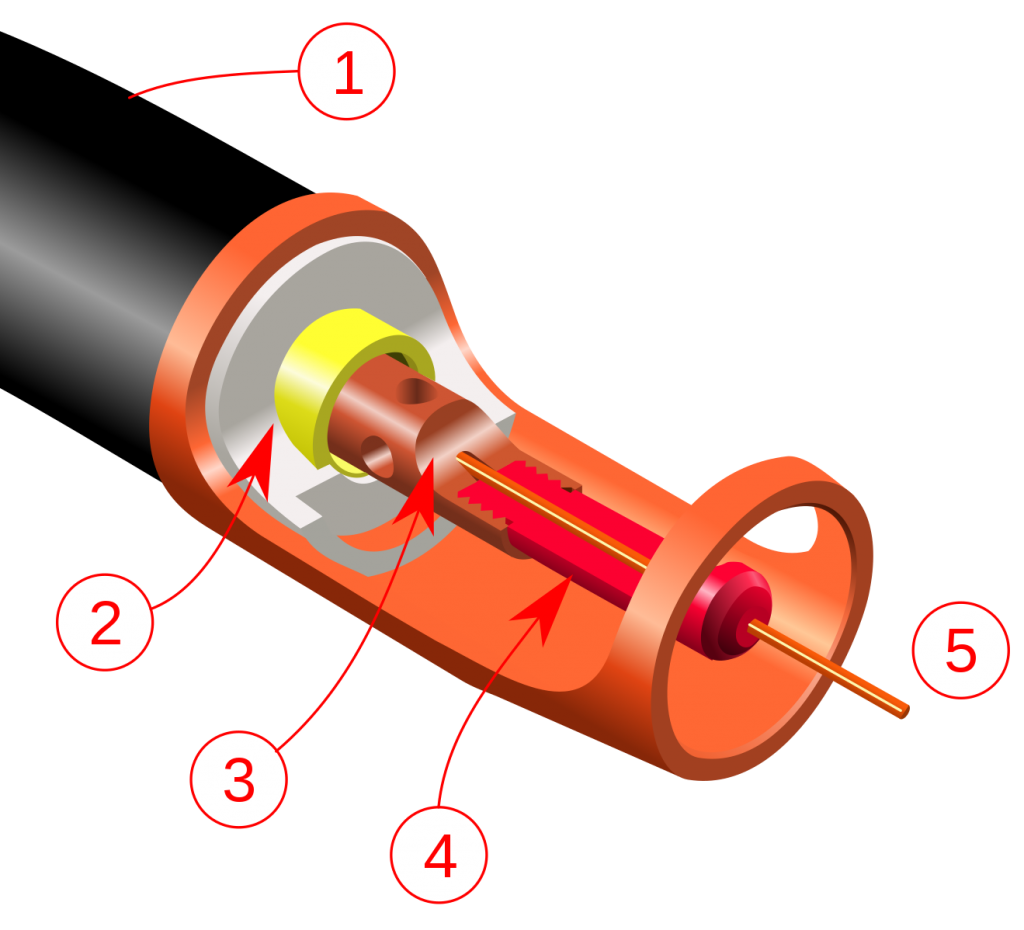
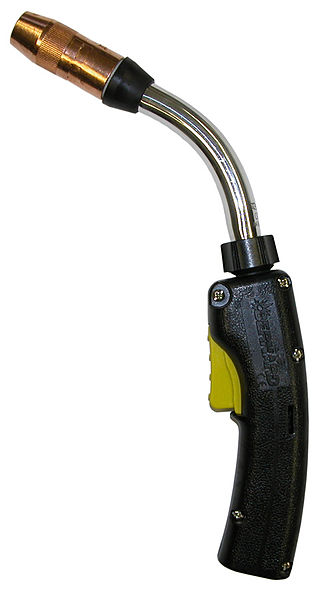
The contact tip is the metal attachment that your wire comes out of. These contact tips have different diameters to accommodate multiple wire sizes.
Too long of a distance causes problems because there is not enough gas flow to reach the arc. If your weld isn’t shielded properly, then it will be quite weak. This is true for all welding processes.
By keeping your contact tip closer to the metal, you will ensure that the shielding gas can create a proper atmosphere to protect your weld puddle.
Also with long distances, your wire won’t melt into the piece and it will start making loud cracking noises. This is because the wire starts snapping since it can’t fuse into the base metal. This will leave broken wire strands stuck to your metal.
Having too far of a distance also means your welds won’t wet in, and the wire doesn’t have a chance to fuse into your material. You will know you have the proper distance when the wire is melting nicely into your metal as you push your puddle along.
Welding too close causes less problems, but it still isn’t ideal. First, it is much harder to see your arc this way because your nozzle is covering your weld puddle. This is problematic because beginners should watch their puddle to see how it moves with their travel speed. Watching your puddle will allow you to see how it is flowing.
Second, close distances can cause the MIG spatter to clog up your nozzle or jam your wire. This means you will spend more time cleaning your nozzle and less time welding. When the spatter starts to stick to your nozzle, the wire won’t be able to flow properly.
2) Bad Wire Tension/Drive Roll Issues
All MIG machines have wire tension control. This is the amount of pressure placed on the wire inside of the machine so it won’t unravel on you. High tensions can cause the wire to break or jam on the way to the nozzle, and low tensions can throw the wire off the drive rolls or unravel your entire spool.
This just takes practice. Once you have a proper wire tension setting, you’ll be good to go. This will make it easier to change your spools in the future. Having a spool unravel on you will make you really want to dial in these tension controls for the next time.
It is often hard to fix a spool that is unraveled. This can mean that you wasted money on a spool that is now unusable.
3) Improper Wire Speed/Voltage Settings
These are two settings that must work in harmony with each other. Beginners struggle with dialing these in, but it isn’t too hard. The voltage is the amount of electrical power that is running to your arc. Depending on wire diameter and wire type (flux, hard wire etc), voltages generally range from 16-30 volts.
Wire speed is measured in inches per minute. The higher the speed, the more wire material is flowing out of the nozzle. Higher speeds produce wider beads. Lower speeds are great for thin material and smaller welds. Applicable speed ranges are 100-500 ipm.
Really high wire speeds paired with high voltages are considered a “spray transfer”. The weld is so hot and fast that it literally sprays onto your material.
The reason these two settings must work together is because they are heavily related. If you have a high wire speed and low voltage, there won’t be enough power to melt your wire into the weld.
If you have a low wire speed and high voltage, your weld may get too hot and cause undercut or other defects.
MIG machines will come with a chart that recommends settings based on your material thickness.
Example:
- .030” wire on 1/8” mild steel = 17 volts @ 220 inches per minute
So, depending on your wire size and your material thickness, these charts will tell you the exact settings they recommend. This is especially helpful for new welders who are making mistakes with their settings. These charts are also available online, although they do vary from company to company.
As you progress with MIG welding, you will find that you start memorizing these settings. They will become second nature and you won’t have to refer to the chart as much. You also may find that your favorite settings differ from the chart you were referring to. They are not hard rules, but more of a general guideline.
It should also be noted that every MIG machine runs a little differently. This is true for all welding machines. Your favorite settings for 1/8” steel might differ from your buddy who has a different MIG machine.
4) Gas Flow Problems
Beginners may struggle to find the correct gas flow for their projects. For MIG, common flows are between 15-30 cubic feet per hour (CFH).
On your machines chart, there will also be recommendations for gas flow. In our MIG gas article, we cover the best gases for hardwire, flux core, stainless and aluminum MIG.
Also, AWS welding tests will have gas flow settings that must be followed. If you go outside of these parameters, your test could be void. Make sure that you know your parameters so you can avoid busting a test.
For most hardwire MIG, we tend to have our gas set at 25 CFH. We find that this shields very well for most applications. If you bump up to 30 CFH or more, you will be going through a lot of gas, which can get pretty expensive. We usually only run these high flows with dual shield flux core applications.
Porosity is a weld defect that is very undesirable. With MIG, porosity is usually caused by low gas flows. If you find porosity (small holes) in your weld, the best thing to do is to turn up your gas. If this doesn’t work, it could be an issue of contact distance (listed above) or the angle of your nozzle.

5) Trouble Learning Bead Patterns
There are many ways to run a MIG bead. Running a straight bead just involves pushing or pulling your puddle in a straight line. For vertical welds, a side to side weaving pattern is very common.
Beginner MIG welders tend to struggle when it comes to learning bead patterns. These are slightly more complicated and take time to learn.
Some welders prefer to use different patterns to achieve multiple bead profiles. Patterns like “cursive e’s” can help with getting a flatter bead. These patterns can also be a series of triangles, circles etc.
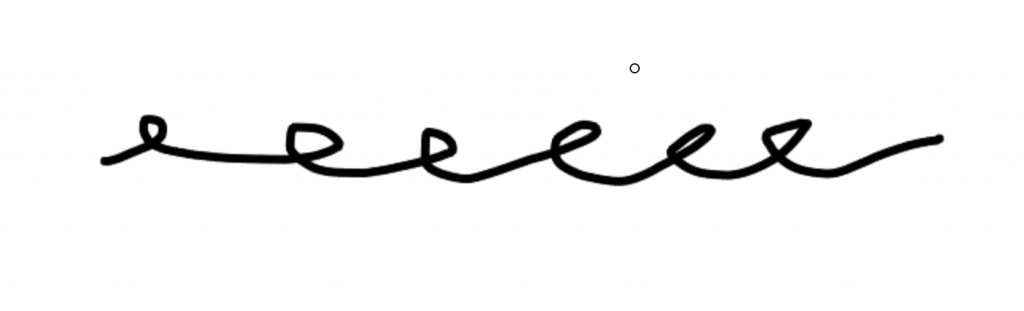
Beginners will have a tough time with this at first, but once mastered – patterns can produce some very eye catching beads. This is usually due to their flatter, wider profile.
6) Travel Speed Issues
Travel speed refers to the speed in which you are laying down a weld. In order to achieve a bead with a consistent width, you must keep your travel speed the same throughout the weld.
Faster travel speeds result in thinner beads, and slower speeds result in wider beads.
When you look at a beginners weld, you may notice they have made the mistake of not keeping a consistent travel speed. Because of this, the bead will be wide in some areas and narrow in others.
Teaching welders to maintain their speed will result in better looking welds. This is especially important on plate tests when you are not allowed to travel outside of the groove.
This issue of travel speed also applies for stick and TIG welding as well. You can only get a consistent bead if you control your speed.
7) Warping
Unlike other trades, welding can contribute to projects warping – often quite a bit. In order to avoid warpage, welders must know how to sequence their welds. They must also learn to control heat input, and make sure to give the metal time to cool in between welds.
Weld sequencing involves “tacking” your project together with small welds, and then welding in different areas while other parts of the project cool down.
The rule of thumb is that welds shrink after completion. Let’s say you weld a 90 degree joint with a single bead on one side. As that weld is cooling, it will shrink and pull the 90 degree angle off center. Since the weld has shrunk, it will pull towards the side that it was welded on.
Higher wire speeds and higher voltages will cause more extreme warping. This is why it is important to use clamps to ensure that your project isn’t warping all over the place. Going overboard with clamping is never a bad idea, it is actually a good quality measure.
As fun as it is to weld a bunch of beads in a short amount of time, this can cause really bad warpage. Letting the welds cool is essential if you want your project to retain its original dimensions.
8) Not Prepping Your Metal
Although the MIG process is known to blast through mill scale and oil, it is always best to take the time to prep your material. Why risk bad penetration when you can take a minute to clean your pieces?
If you don’t remove mill scale/rust/oil, you risk improper penetration. This means that your weld didn’t wet in to the base material, and you risk having it crack in the near future. This is an unnecessary risk that can be easily avoided.
If you take an angle grinder and remove the scale, you can rest assured that there are no extra contaminants in your weld. It is just raw metal on metal. This was especially important to me when I ran my mobile welding business – I didn’t want to have to come back and repair my work. I wanted my welds to hold – and that’s why I offered a long term guarantee to my clients.
Taking the time to prep your material will save you huge hassles down the road. Clients will realize that your welds are still holding years later, and they’ll be more apt to mention your name to other potential clients.
Beginners often make the mistake of rushing into their projects. They won’t prep their material or cut the pieces right. They just want to weld as soon as possible. Once beginners learn to avoid this mistake, their projects and work flow will improve dramatically.
9) Improper Nozzle Angles
While hardwire MIG welders generally “push” their puddle, Flux core welders tend to “drag” their puddle. This is because with processes that involve slag, you must pull the puddle to let the slag harden at the back of it.
If you push a puddle that produces slag, the slag will often mix with the weld and form what’s called a “slag inclusion”.
Newer MIG converts will struggle with these angles. They may have too steep or too shallow of a nozzle angle. They may push their flux core puddle when they should be dragging it.
It is important to learn when to drag and when to push your puddle. You may gravitate towards too shallow of a nozzle angle, which severely limits your penetration. You also may use too steep of a nozzle angle, which can blow through thinner metals.
These angle options are best taught by veteran welders who have a lot of time under the hood. Beginners can benefit from this learning experience and avoid mistakes such as improper angles.
Wrap Up
Although there are dozens of mistakes you can make while MIG welding, these 9 are the most common ones we see.
If you practice hard and avoid these mistakes, you will be on your way to becoming a proficient MIG welder.
Since MIG welding is one of the most popular welding processes, it is important to know how to do it – especially if you want to land a job in a fabrication shop. If you can’t MIG weld properly, the job hunt will be pretty difficult.